
Aluminum humbles even experienced welders—and for good reason. Unlike steel, it pulls heat fast across the whole piece. It also hides a stubborn oxide layer that melts at close to three times the temperature of the base metal. Hesitate for a second, and you get burn-through before you even see it coming.
First attempt left you with a warped, porous mess? You’re not alone.
Here’s the good news: TIG welding aluminum and MIG welding aluminum are both learnable skills—and modern solutions like a laser welder make the process even easier to control and more consistent. You just need to understand why aluminum behaves the way it does before you strike an arc. This guide covers every critical step:
-
The right equipment
-
How to clean your material the right way
-
Dialing in your settings
-
The seven mistakes that wreck most beginners’ welds—and how to dodge them
Why Aluminum Welding Is So Challenging (And How to Overcome It)
Four separate physics problems hit you at once the moment you strike an arc on aluminum. Each one fights against the others—and understanding this is the first step in learning how to weld aluminum properly.
The oxide layer on aluminum’s surface melts at 2072°C. The base metal beneath it? 660°C. That 3x gap is a real problem. Your arc has to burn through a heat-resistant barrier before it reaches the actual weld zone. On top of that, aluminum carries heat away 6 times faster than steel. Thermal energy leaves your puddle almost as fast as you add it.
Then there’s hydrogen. Molten aluminum pulls it in fast and holds it tight. The result? Porosity and internal voids that quietly destroy structural integrity.
The fix isn’t one thing. It’s a system:
-
Mechanical cleaning first — use a dedicated stainless steel brush to strip the oxide layer before you touch the torch
-
Tight heat control — pulse TIG or adjusted travel speed keeps you inside that narrow window between burn-through and cold fusion
-
Correct filler — 4043 or 5356 rods, matched to your base alloy
-
Contamination discipline — oil, moisture, and grease don’t need much to create blowholes
Get these four pressure points right, and aluminum stops feeling like the enemy. It starts feeling solvable.
TIG vs MIG vs Laser for Beginners: Which Method Should You Start With?

Three methods, three different learning experiences — and the wrong choice costs you time, money, and real frustration.
MIG is where most beginners should start. The continuous wire feed cuts out one coordination variable. You focus on travel speed and angle. It handles thicker aluminum (above 5/16″) and forgives small mistakes. Cleanup takes a bit of extra work, but the welds hold.
TIG is the precision tool of the three. You’re managing a torch, a filler rod, and a foot pedal — all at once. One slip ruins the bead. Save it for later, once your hands know what good technique feels like.
Laser changes things up. Pre-programmed settings, a touchscreen interface, and speeds about four times faster than TIG. You get cleaner welds with less heat distortion. The main drawback is upfront cost. Budget allows it and you’re working with thin aluminum? It’s the easiest path of the three.
|
Method |
Best For |
Entry Cost |
Learning Curve |
|---|---|---|---|
|
MIG |
Thick aluminum, DIY builds |
$140–$1,000 |
Low |
|
TIG |
Thin/precision work |
$200–$2,500 |
High |
|
Laser |
Thin, high-quality welds |
$2,500+ |
Lowest |
Start with MIG. Graduate to TIG.
Upgrade to a laser welder when you’re ready to work faster, reduce rework, and achieve clean, consistent welds with less effort.
Essential Tools and Materials Checklist for Aluminum Welding
Wrong equipment doesn’t just slow you down — it guarantees failure before you start.
Here’s what you need, and why each piece matters.
The Welder
TIG welding aluminum requires AC output. DC can’t break through the oxide layer — full stop. Look for a machine with square wave AC, adjustable frequency, and AC balance control.
Two solid options to consider:
-
TIG325X AC/DC — built for serious, heavy-duty work
-
MIG285 (285A) — covers MIG and TIG on aluminum up to ½” thick, at a lower price point
But here’s the reality:
If you want to skip oxide layer headaches, complex setup, and steep learning curves, laser welding offers a much simpler alternative.
A handheld laser welder can weld aluminum with minimal prep, stable penetration, and significantly less heat distortion—making it easier for beginners to achieve consistent results.
Tungsten and Filler
Use 2% ceriated tungsten (grey, WC20), ground to a sharp point. It beats pure tungsten for arc stability on AC.
For filler, 4043 is your go-to. It flows well, forgives mistakes, and works with most aluminum alloys. Switch to 5356 for marine or structural jobs where strength takes priority over ease of use.
With laser welding:
No tungsten. No filler selection guesswork in most thin-metal applications.
You reduce variables—and reduce mistakes.
Gas and Supporting Gear
Run 100% argon at 15–25 CFH. Too low and you get porosity. Too high and turbulence pulls in contaminants. Stay in the range.
You’ll also need:
-
A dedicated stainless steel brush — never share it with steel work
-
U-groove drive rolls
-
Teflon liner for MIG
-
Heat sinks and clamps
Laser welding advantage:
While shielding gas is still used, the setup is simpler, and the process is far less sensitive to operator variation—meaning fewer defects and less rework.
PPE — The Non-Negotiables
Don’t skip any of these:
-
Auto-darkening helmet
-
Goatskin TIG gloves
-
Leather jacket
-
Steel-toed boots
Laser welding also requires proper eye protection and safety procedures, but its controlled, low-spatter process often results in a cleaner and more comfortable working experience.
How to Clean Aluminum Before Welding (The Step Most Beginners Skip)
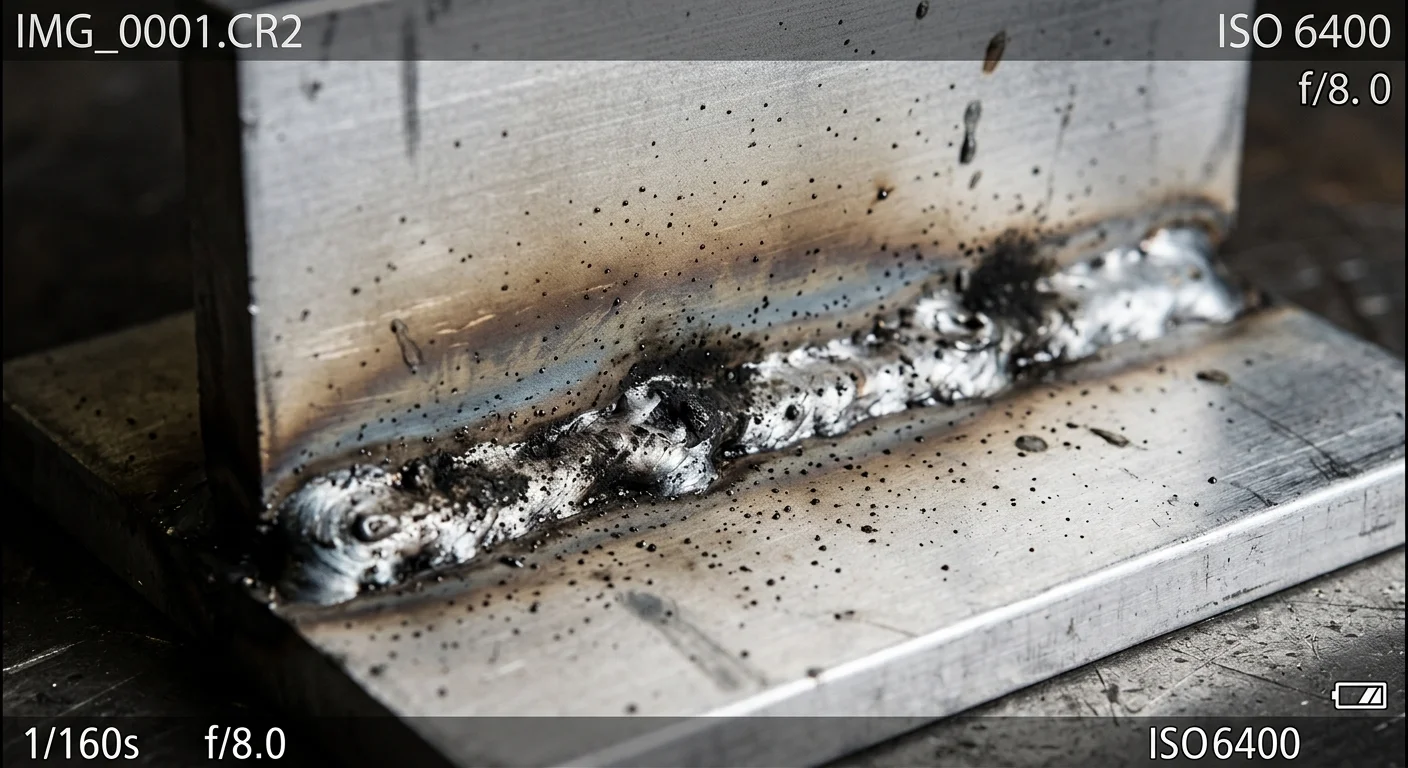
Bad prep doesn’t just weaken your weld—it shows up immediately in the puddle as black soot, pepper specks, and a murky brown haze. That haze is a warning sign that something went wrong before you even struck an arc, and it’s one of the most common issues in aluminum welding for beginners.
The fix is a two-step sequence. Get the order right. It changes everything.
Step 1: Degrease first. Wipe both sides of the joint with acetone, MEK, or toluene. Not alcohol. Not chlorinated solvents. Use cheesecloth or paper towels — never shop rags. Factory aluminum carries oil from the mill. Even surfaces that look clean hold a 1% residue film. Solvent removes 99%+ of it. Skip this step, and your brush pushes those hydrocarbons straight into the metal.
Step 2: Then brush. Use your dedicated stainless steel brush — the one you never touch steel with. One direction, light pressure. Blow off oxide dust every few strokes. This stops it from packing back in.
Now weld. Oxide reforms within minutes. Clean the metal, then weld. Don’t walk away first.
Step-by-Step TIG Welding Aluminum: From Equipment Setup to Final Bead
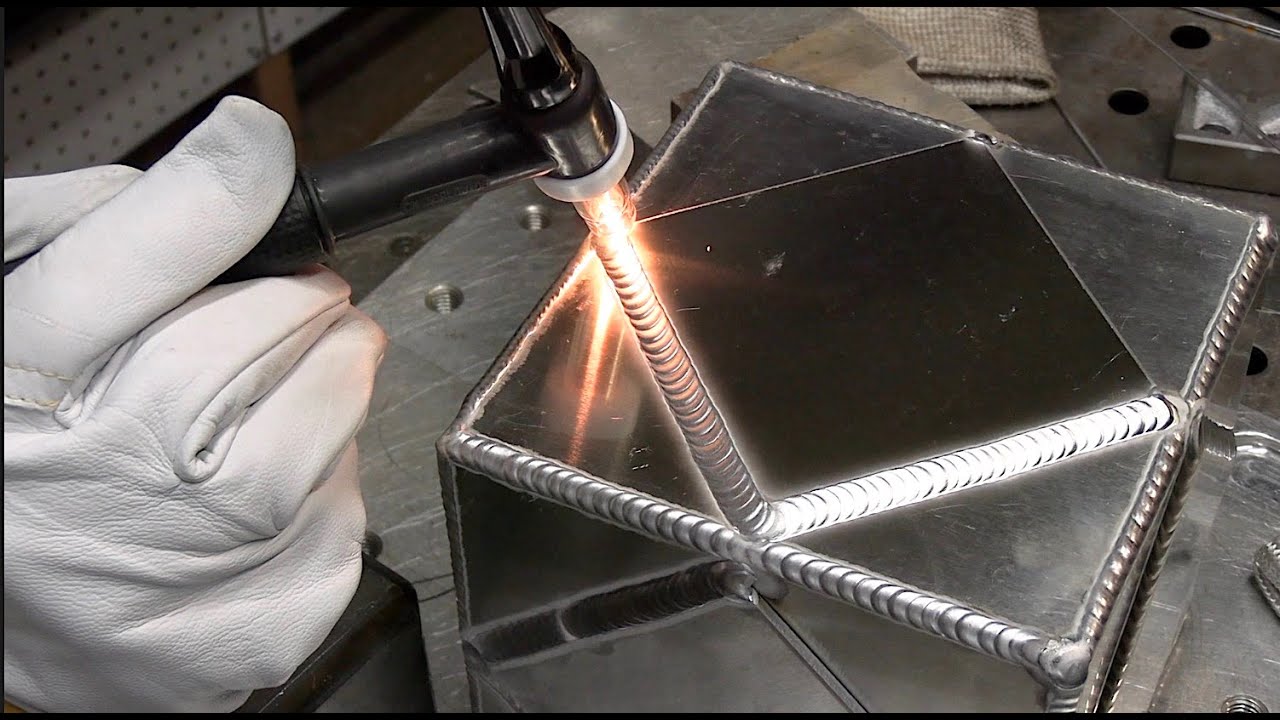
Setup is where most beginners lose the weld before it even starts—and this is especially true in aluminum welding for beginners. Get the machine wrong, hold the torch incorrectly, or skip the ground clamp, and the weld fails before you have a chance. Bad preparation kills the weld, and no technique can fix that. Follow this sequence once, step by step, and you’ll strike your first arc on aluminum with something most beginners lack: a real chance at a clean, stable bead.
1. Configure the Machine
Start with the correct machine setup—this determines everything. Set polarity to AC (non-negotiable for aluminum), and use 100% argon shielding gas with short pre-flow and automatic post-flow. If welding thicker aluminum and power is limited, switch to an argon-helium mix for deeper penetration. Use ER4043 filler by default, and switch to ER5356 for higher-strength applications.
2. Assemble the Torch
Install the torch components correctly to ensure stability. Use 2% ceriated tungsten (sharp point) for a stable AC arc. Tighten the collet and cap securely, and attach the ground clamp directly to the workpiece, not the table, to ensure proper current flow.
3. Set Your Torch Angle and Arc Length
Hold the torch at 70–80° with a slight 5–15° backward tilt. Keep the tungsten about ⅛ inch (one diameter) above the surface. Maintaining a consistent arc length is critical—too close contaminates the tungsten, too far destabilizes the arc.
4. Hold the Filler Rod
Your off hand holds the filler rod at 15 degrees to the workpiece. Your torch and rod should form close to a 90-degree angle to each other. Neither hand grips tight. Loose hands move better and tire less.
5. Establish the Puddle — Without Filler First
Step on the pedal. Watch the puddle form. Don’t add filler yet.
Let the puddle stabilize in size. Monitor its width.
-
Puddle shrinking? You’re moving too fast or not feeding enough heat.
-
Puddle spreading and going watery? Back off the pedal.
Aluminum heats fast — much faster than steel. As the piece warms up, ease off the foot pedal. Near edges, heat concentrates hard. Feather the pedal close to nothing in those spots.
6. Add Filler and Build the Bead
Once the puddle is stable, add filler to the leading edge of the weld pool. Use a steady dab-and-move rhythm to create consistent weld beads. Move your entire hand—not just fingers—to maintain arc stability, and always push the torch forward to avoid contamination.
Before You Strike an Arc: Practice Dry First
Before striking an arc, practice the full motion on a cold workpiece. Build hand coordination and positioning first, then move to actual welding. Starting on scrap material helps you develop control without pressure and leads to faster real progress.
Aluminum TIG Welding Quick Reference
Aluminum typically requires 1.3–1.5 amps per 0.001 inch of thickness, which is higher than steel due to AC cleaning action. Compared to TIG welding, laser welding requires far fewer parameter adjustments—making it easier for beginners to achieve stable, consistent results.
|
Thickness |
Amperage (AC) |
Argon Flow |
Tungsten Size |
|---|---|---|---|
|
1/16″ (1.6mm) |
65–85A |
20–25 CFH |
1/16″–3/32″ |
|
1/8″ (3.2mm) |
120–160A |
20–25 CFH |
3/32″–1/8″ |
|
3/16″ (4.8mm) |
170–220A |
20–25 CFH |
1/8″ |
|
1/4″ (6.4mm) |
220–280A |
20–25 CFH |
1/8″ |
Foot Pedal and Heat Management
Don’t weld aluminum at fixed amperage. Strike hot — up to 1.5× your target — then ramp down 20–30% as the piece heats up. Running a 6-inch bead on 1/8″ aluminum? Start around 150A and finish near 110A.
On material thicker than 1/8″, preheat to 150–230°F. Do the same if your shop drops below 50°F. Stay under 250°F — cross that line and hot cracking becomes a real risk.
For thin material under 1/16″, skip preheat. Clamp copper backing bars the full length of the joint and let the metal do the work.
Keep argon flow between 20–25 CFH. Push past 30 CFH and turbulence pulls contaminants straight into the puddle.
MIG Welding Aluminum: Step-by-Step Guide (With Spool Gun Setup)
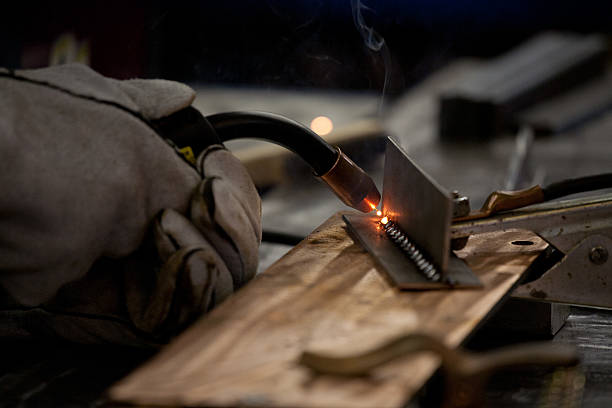
Aluminum MIG welding is not the same as steel.
If you use a standard MIG setup, you’ll run into wire jams, bird-nesting, and unstable feeding almost immediately.
Follow these steps to get it right from the start.
Step 1: Use a Spool Gun (Not a Standard MIG Gun)
Standard MIG guns are designed for steel, but aluminum wire is much softer and easily bends or jams in long cables. Using a spool gun—with the wire spool mounted directly on the torch and a short feed path—ensures smooth, stable feeding, preventing bird-nesting and giving you a more consistent arc from the start.
Step 2: Set Up the Correct Shielding Gas
Aluminum welding requires 100% argon—never use CO₂ mixes like C-25, as they will contaminate the weld pool. Start with 35 CFH and fine-tune to around 30 CFH depending on conditions. Too little gas leads to porosity and soot, while too much creates turbulence that pulls in contaminants.
Step 3: Set Proper Wire Stickout
Wire stickout plays a major role in arc stability. Keep it at ½ to ¾ inch (12–18 mm) for best results. Too short can cause burnback into the contact tip, while too long leads to an unstable arc. Maintaining a consistent stickout helps ensure smooth welding and reduces interruptions.
Step 4: Dial in Voltage & Wire Speed
Aluminum requires higher wire speed than steel to maintain a stable arc and proper fusion. Start with 15.5–16.0 V and 420–425 IPM, then adjust based on material thickness and weld appearance. Fine-tuning these settings helps you achieve better penetration and cleaner welds.
Step 5: Use the “Push” Technique (Critical)
Always push the welding gun forward—this is essential for aluminum. Pushing keeps the argon shielding gas over the weld pool, resulting in cleaner welds. Pulling the gun removes gas coverage and quickly leads to oxidation, soot, and poor weld quality.
Step 6: Maintain Proper Angle
Gun angle directly affects weld quality. Hold the gun at a 45° angle to the joint with a ~20° forward push angle. This setup ensures proper gas coverage and allows the weld pool to form evenly, improving consistency and appearance.
Step 7: Stay Consistent (Aluminum is Sensitive)
Aluminum is less forgiving than steel, meaning small changes in angle, stickout, gas flow, or travel speed can quickly affect results. Focus on maintaining steady movement and consistent parameters to achieve clean, uniform welds.
Final Tip
Aluminum welding may feel challenging at first, but once your setup and technique are dialed in, the process becomes stable, predictable, and much easier to control.
Laser Welding Aluminum: Step-by-Step Guide for Beginners
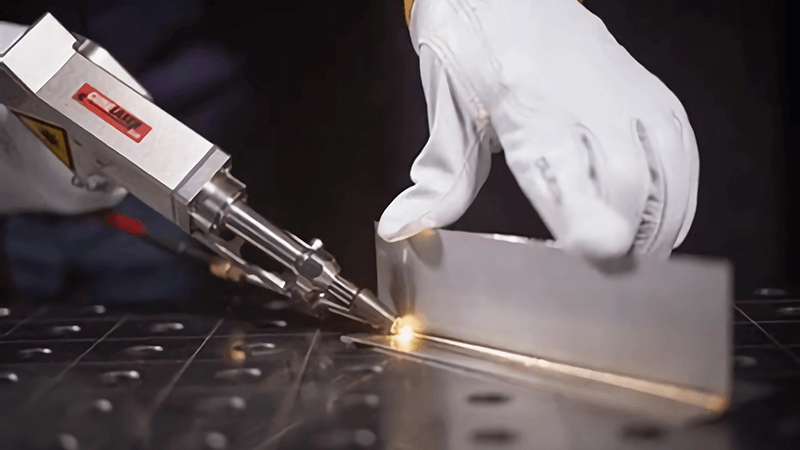
Laser welding aluminum is faster, cleaner, and much easier to control than traditional TIG or MIG welding.
If you want consistent results with less skill dependency, follow these steps.
Step 1: Choose the Right Laser Power
Start by matching power to material thickness:
-
1.5–2 kW → Thin sheets (1–3 mm)
-
2–3 kW → Thicker materials (4 mm and above)
For most aluminum applications, 1.5–3 kW covers everything you need
Step 2: Set the Welding Speed
Laser welding operates at much higher speeds than traditional methods. A typical range is 25–100 inches/min, depending on your material and desired weld quality. Slower speeds increase penetration, while faster speeds reduce heat input and distortion, so balancing speed is key to achieving stable and clean welds.
Step 3: Select the Welding Mode
Laser welding has two main modes:
Pulsed Mode
-
Short, high-frequency bursts
-
Lower heat input
-
Best for thin or heat-sensitive parts
Continuous Wave (Keyhole Mode)
-
Steady laser beam
-
Deep penetration
-
Ideal for thicker materials
Choose based on your material thickness and heat sensitivity
Step 4: Adjust the Focus Position
Focus positioning has a direct impact on weld quality. A standard setup places the focal point at 0.5 mm below the surface. For aluminum, applying a +3–5 mm positive defocus can significantly improve results by reducing spatter and stabilizing the weld pool. Proper focus adjustment leads to smoother and more consistent welds.
Step 5: Set the Shielding Gas
Using the correct shielding gas is critical for clean welding. Always use 100% argon, with a flow rate between 20–40 CFH. This ensures proper protection of the weld pool and helps prevent contamination, porosity, and oxidation during the welding process.
Step 6: Choose the Right Aluminum Alloy
Different aluminum alloys respond differently to laser welding. For best results, stick with 5000 series and 6000 series aluminum, as they offer more predictable welding behavior and are widely used in industrial applications.
Step 7: Prevent Cracking (Important for 6000 Series)
6000 series aluminum is prone to hot cracking during welding. To avoid this, use 4047 filler wire, which improves fluidity and reduces cracking risk. This helps create more stable welds and ensures better structural integrity.
Final Tip
Laser welding offers clear advantages, including faster processing speed, cleaner welds, and reduced dependence on operator skill. Once your parameters are properly set, the process becomes highly repeatable, efficient, and easy to control, even for beginners.
Frequently Asked Questions About Aluminum Welding for Beginners
These questions come up all the time — and they deserve straight answers.
Why is aluminum so much harder to weld than steel?
Two numbers explain it: aluminum melts at 1,200°F, but its oxide layer melts at 3,700°F. That 2,500°F gap puts a heat-resistant membrane between you and a clean weld. Push through it wrong, and molten aluminum runs out like a burst pipe — fast and out of control.
Can a regular MIG welder handle aluminum?
Yes, but use a spool gun. Aluminum wire is soft. Long cable runs tangle it into a bird’s nest. A spool gun shortens the feed path to inches, not feet. That alone solves most feeding problems.
What shielding gas do I need?
Pure argon. No exceptions. CO2 oxidizes the puddle and ruins the weld. For thicker sections that need deeper penetration, argon-helium is the right call.
Which filler rod should beginners use?
Start with ER4043. It flows clean and covers small errors well. Once the job calls for structural strength, switch to ER5356.
Should I preheat aluminum?
It’s optional. Do it if you need to, but stay under 230°F. Go past that, and heat-treated alloys lose their strength for good.
Conclusion
Aluminum has a tough reputation—and it’s earned. Every skilled welder started where you are now: messy beads, burn-throughs, and frustration. Focus on the basics: clean your metal thoroughly, set your parameters before you start, and respect the oxide layer—it will fight you.
Now don’t just read—go weld something. A scrap piece, a broken bracket, anything. Progress comes from practice, not theory. The gap between “this feels impossible” and “I’ve got this” is only a few failed welds. And if you want to speed things up, a laser welder can help you get cleaner, more consistent results faster. Start now—go make some sparks.